Getting Started
This section guides you through your first run of EasyNavigation (EasyNav) using a simulated Turtlebot2 robot in a domestic environment.
If you have not yet installed EasyNav, please complete the steps in Build & Install.
Overview
We will run a ready-to-use simulation setup consisting of:
Robot: Turtlebot2 (Kobuki)
Environment: indoor domestic map
Stack: Simple Stack included within easynav_plugins
Simulator: Gazebo Harmonic with RViz2 visualization
Workspace layout
Assuming you followed the Build & Install instructions and build from sources, your workspace should look like this:
~/easynav_ws/
├── src/
│   ├── EasyNavigation/
│   ├── easynav_plugins/
│   ├── NavMap/
│   ├── yaets/
├── install/
├── build/
└── log/
Additionally, this guide will make use of a simple indoor testcase and a Gazebo simulation environment. Clone these repositories into your src folder and instell their dependencies:
cd ~/easynav_ws/src
git clone https://github.com/EasyNavigation/easynav_playground_kobuki.git
git clone https://github.com/EasyNavigation/easynav_indoor_testcase.git
# Clone third-party dependencies using vcs tool
vcs import . < easynav_playground_kobuki/thirdparty.repos
# Install dependencies via rosdep
cd ~/easynav_ws
rosdep install --from-paths src --ignore-src -y -r
Rebuild the workspace to include the new packages and source the environment:
cd ~/easynav_ws
colcon build --symlink-install

# Source ROS 2 first (jazzy / kilted / rolling)
source /opt/ros/jazzy/setup.bash
# Then source the workspace
source ~/easynav_ws/install/setup.bash
Repository overview
easynav_playground_kobuki –> Gazebo simulation for the Turtlebot2 (Kobuki).
easynav_indoor_testcase –> provides maps, parameter files, and RViz configurations for indoor navigation.
Simulation setup
Once your workspace is built and sourced, launch the Gazebo simulation:
cd ~/easynav_ws
ros2 launch easynav_playground_kobuki playground_kobuki.launch.py
This starts a Gazebo Harmonic simulation of a Turtlebot2 robot in a domestic environment.
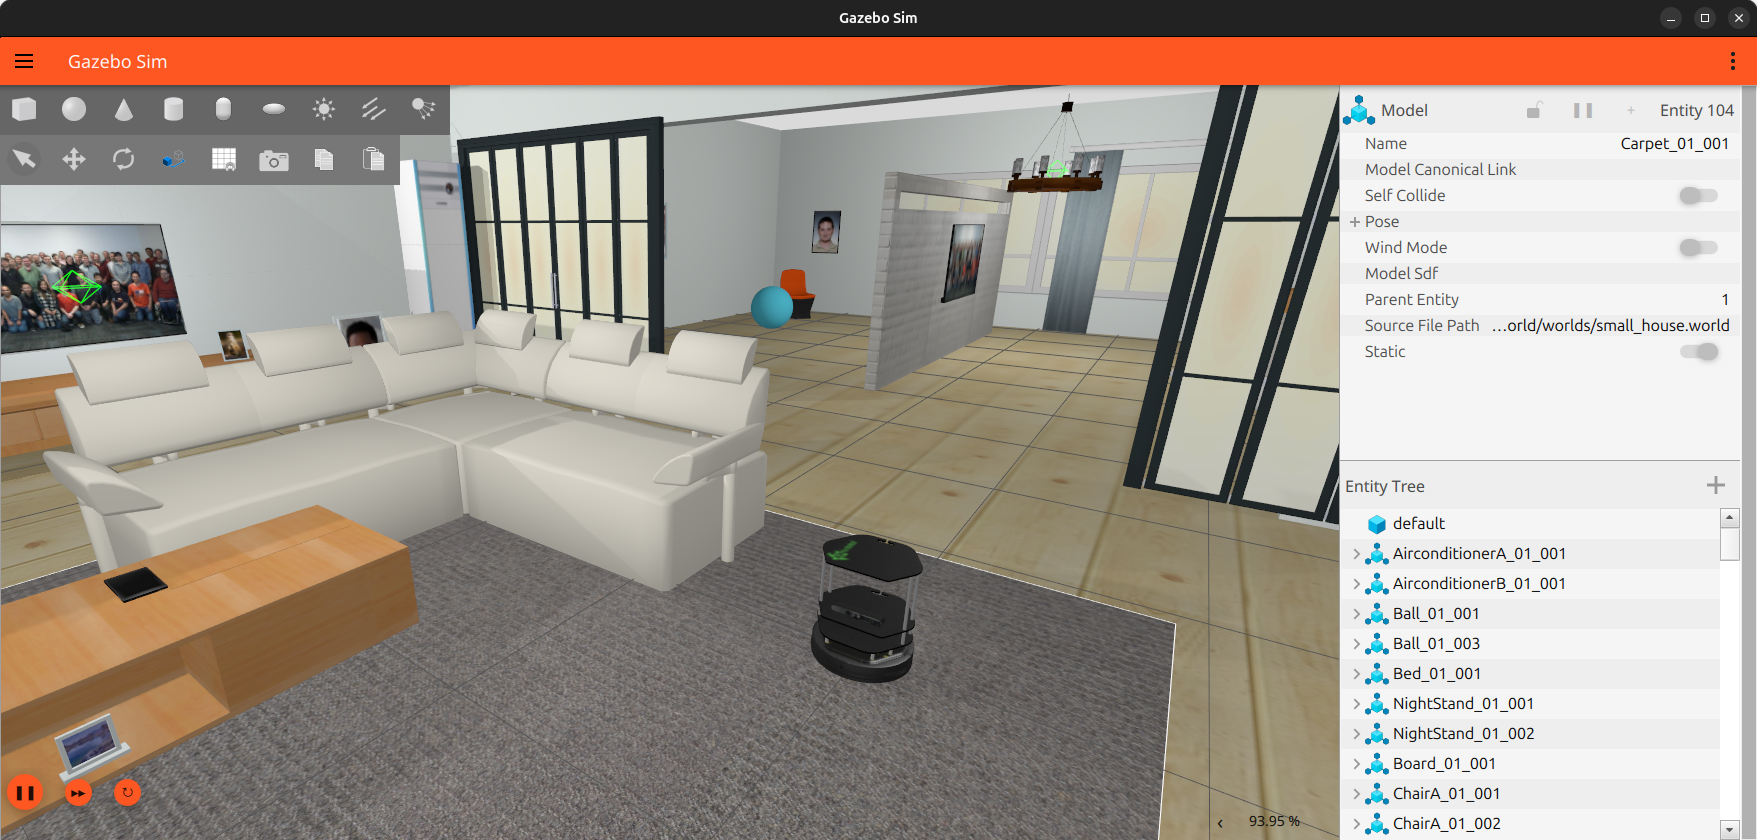
To save resources, you can disable the Gazebo graphical interface:
ros2 launch easynav_playground_kobuki playground_kobuki.launch.py gui:=false
Visualizing in RViz2
Open another new terminal and start RViz2 with the provided configuration:
# Note: First, source the environment as shown previously.
ros2 run rviz2 rviz2 \
   -d ~/easynav_ws/src/easynav_indoor_testcase/rviz/simple.rviz \
   --ros-args -p use_sim_time:=true
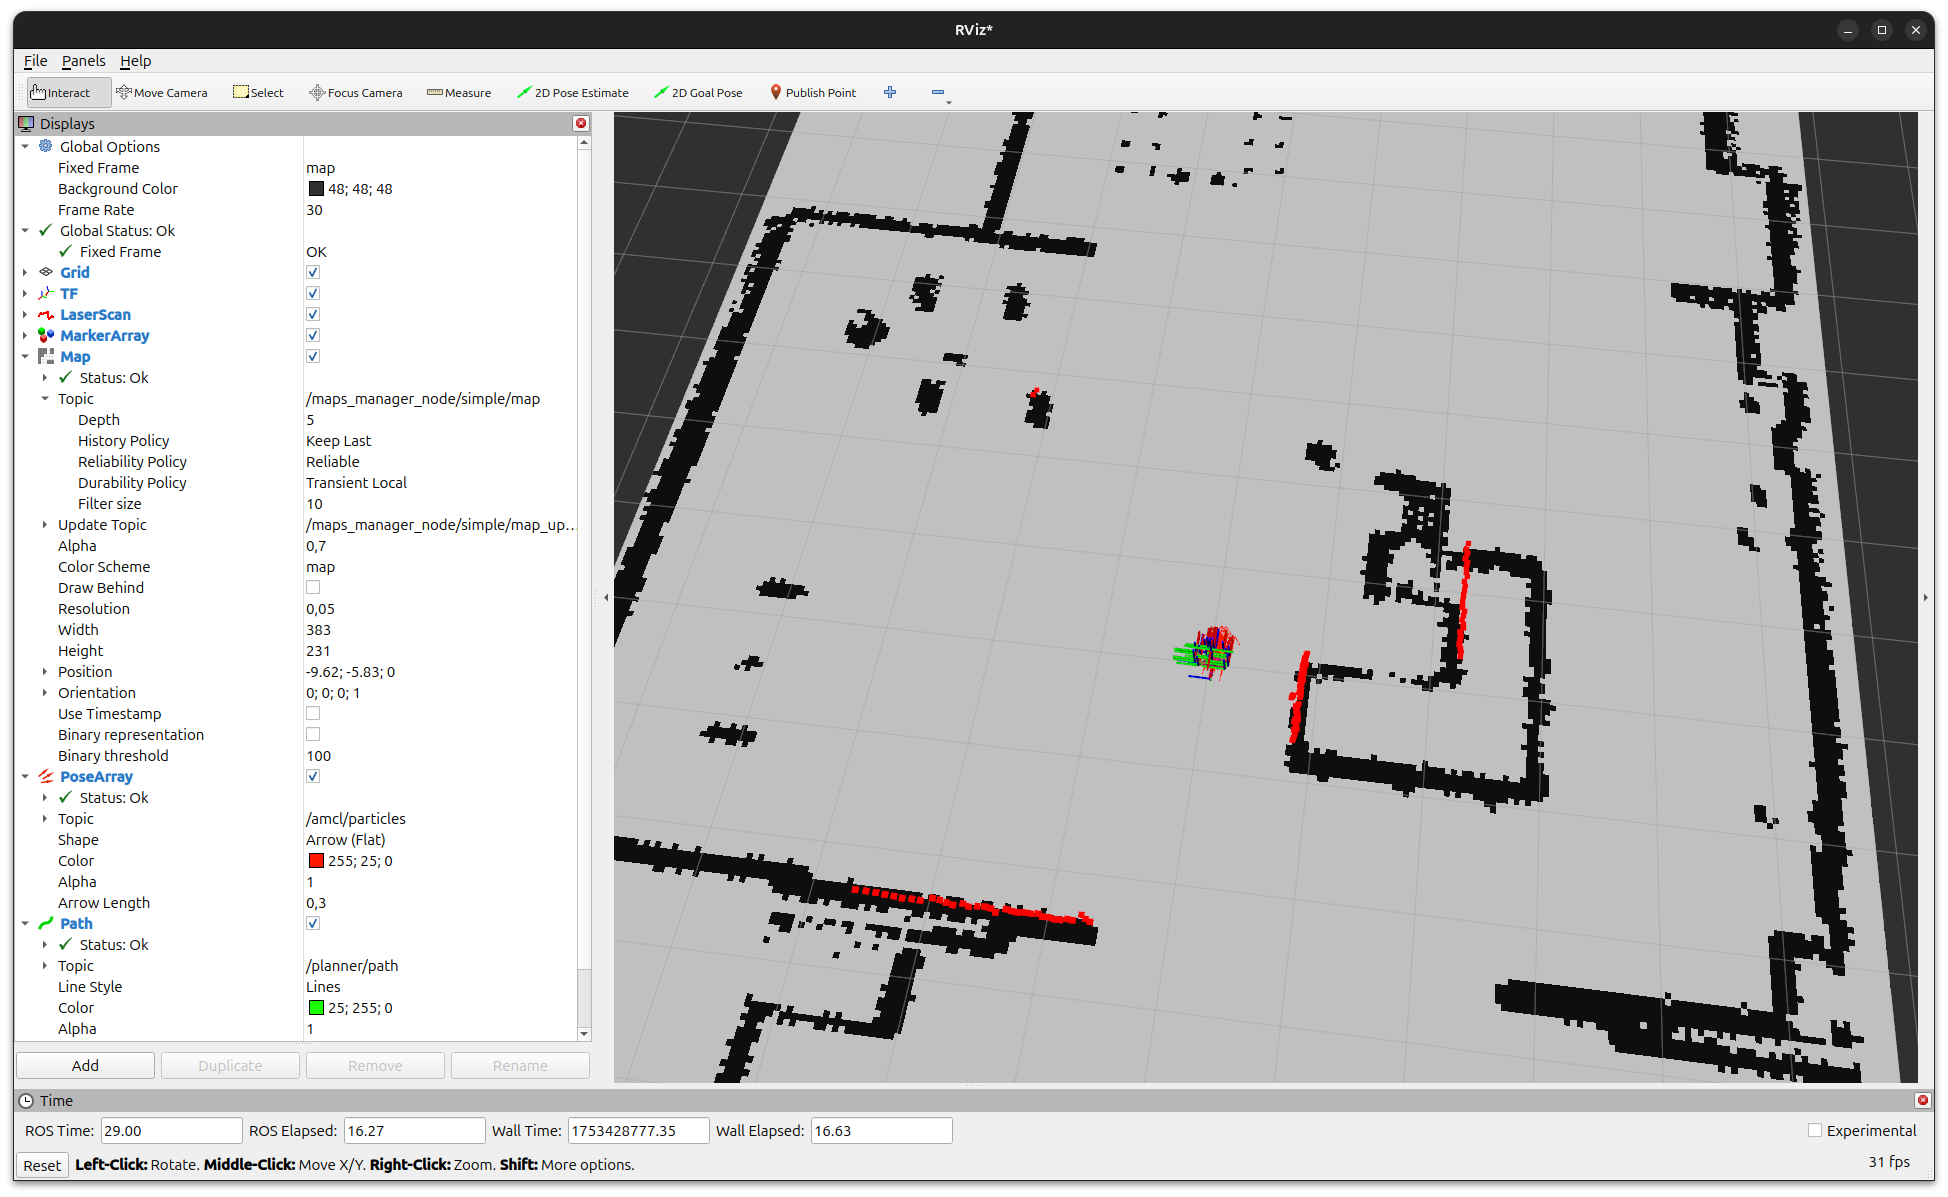
Note
In RViz2, ensure the QoS of the /map topic is set to Transient Local
so that the map is properly displayed when EasyNav publishes it.
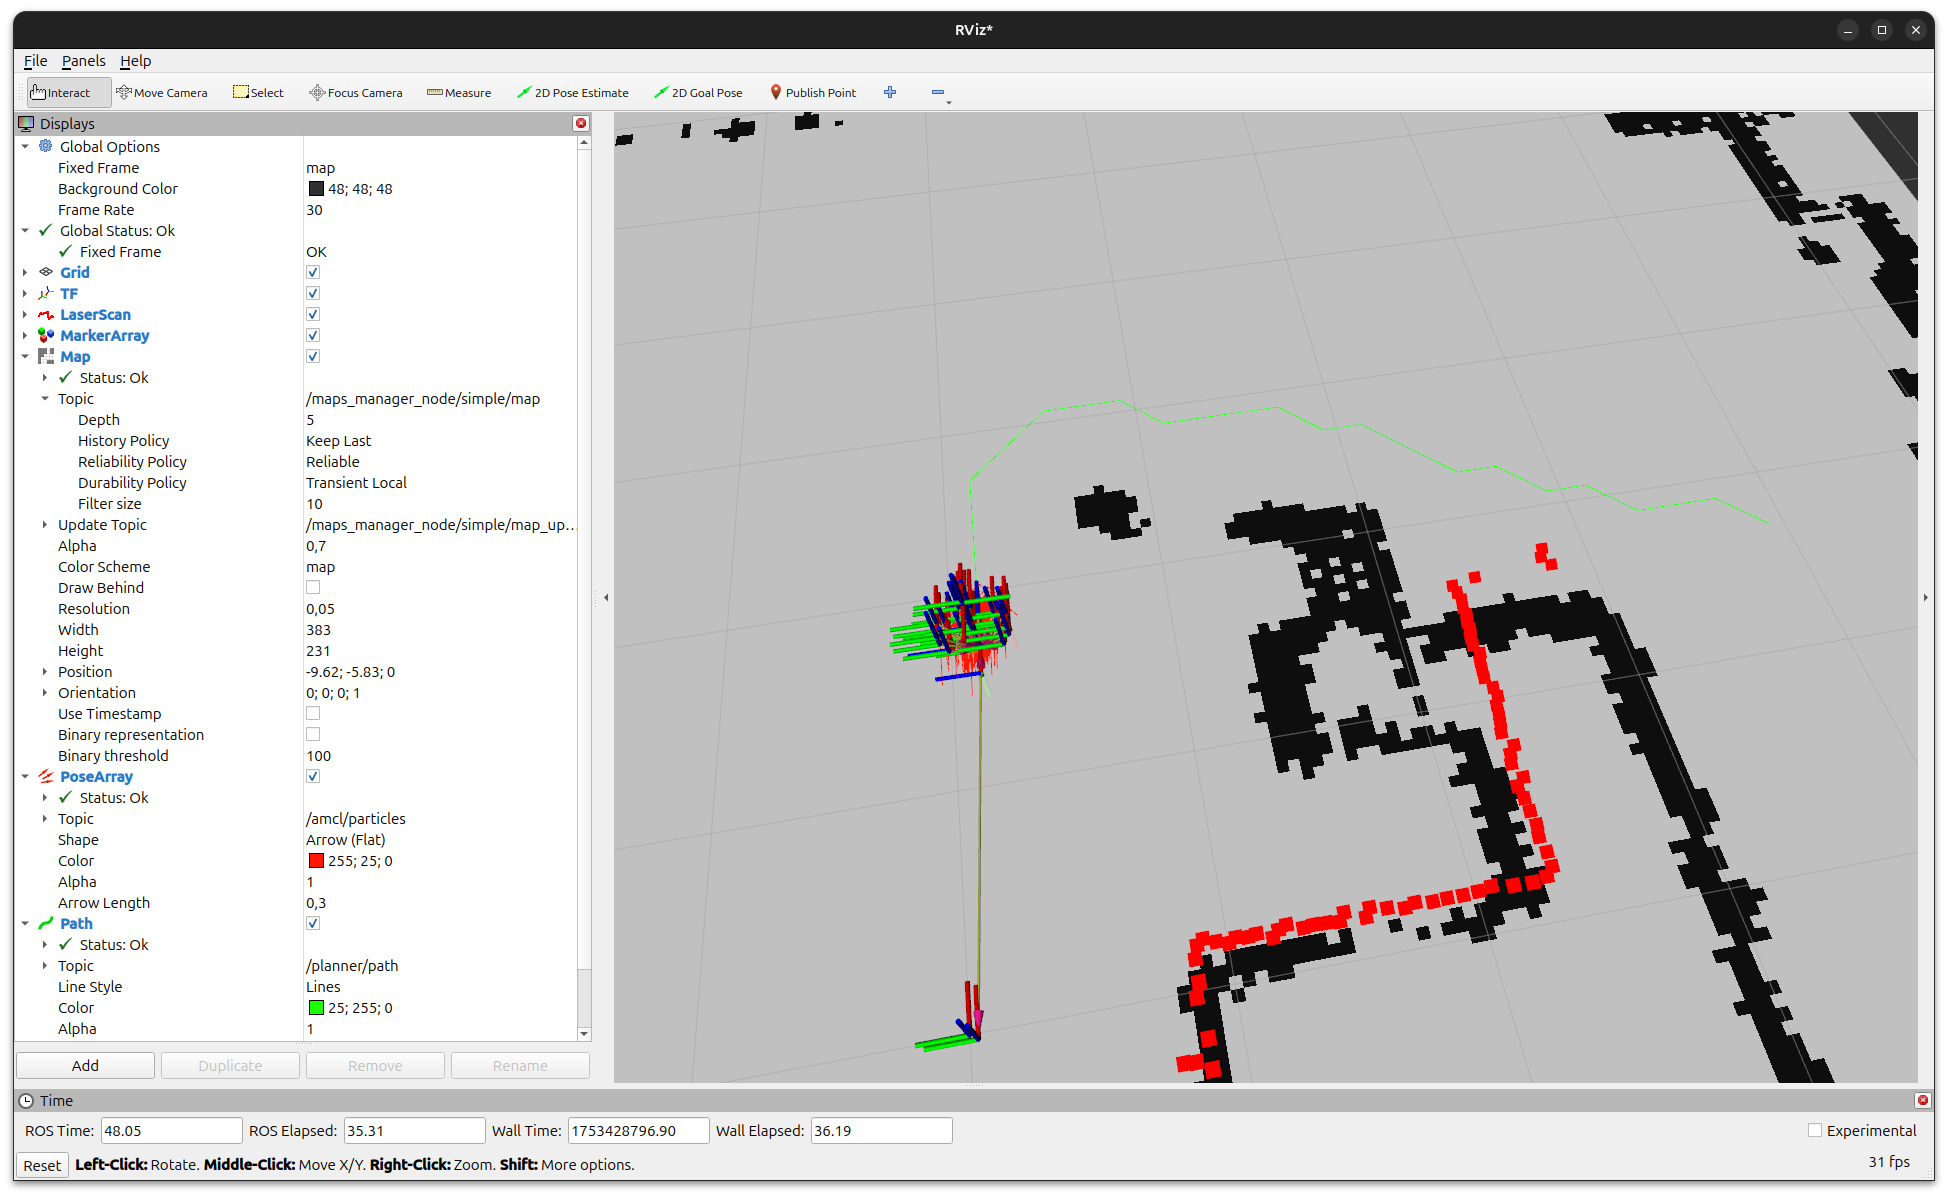
Sending navigation goals
Once RViz2 is open, use the “2D Goal Pose” tool (in the top toolbar) to send a navigation goal. Click on a point in the map, and the robot will start navigating.
Note
The Simple stack contains very basic algorithms, like A* and PID-based controller. It is expected that navigation won’t be optimal.
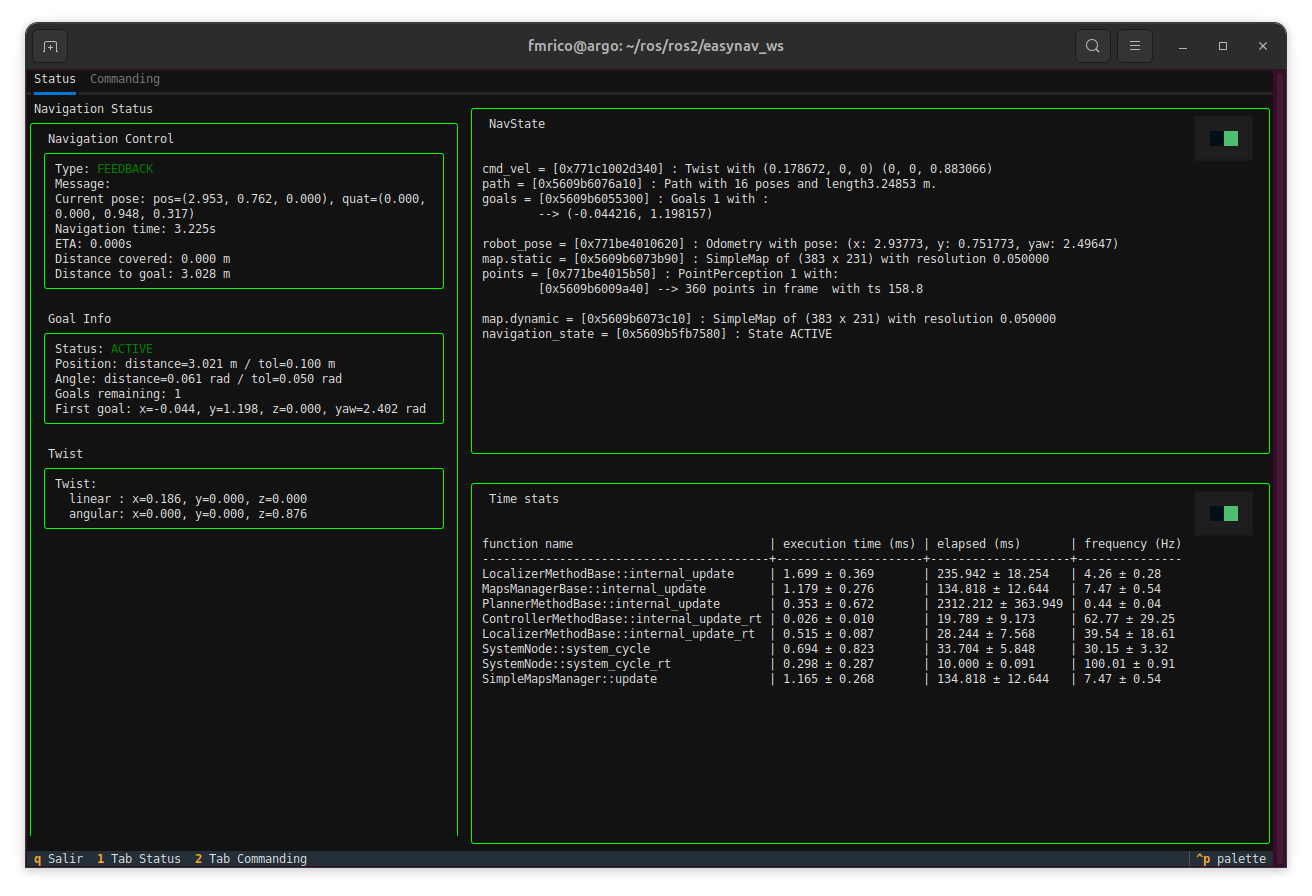
Visualizing internal process with the TUI
In addition to RViz2, EasyNav provides a Terminal User Interface (TUI) that allows you to monitor the internal state of the navigation system in real time. It is a text-based dashboard that displays key diagnostic information and performance metrics directly in the terminal.
You can launch it in a new terminal after starting the EasyNav system:
ros2 run easynav_tools tui
The TUI is divided into several panels:
Navigation Control: shows the current navigation mode (e.g., FEEDBACK, ACTIVE), current robot pose, progress toward the goal, and remaining distance.
Goal Info: displays details of the active navigation goal, angular and positional tolerances, and goal list.
Twist: real-time linear and angular velocity commands issued by the controller.
NavState: shows internal blackboard data structures such as robot_pose, cmd_vel, active map, and navigation_state.
Time stats: performance profiling of each system component (localizer, planner, controller, maps manager, etc.) including average execution time and update frequency.
This interface is especially useful for debugging or performance evaluation without relying on graphical tools.
Press q to exit the TUI.
Note
The TUI is optimized for dark terminals and supports color highlighting for active modules and real-time performance indicators.
Troubleshooting
Robot does not move: ensure that both Gazebo and EasyNav terminals are running and synchronized with the same simulation time (use_sim_time:=true).
Map not visible in RViz2: check the QoS setting and verify the /map topic is being published.
Build errors: revisit Build & Install and ensure dependencies were correctly installed via rosdep.
Next steps
You have successfully launched EasyNav with a simulated robot!
Continue exploring:
HowTos and Practical Guides — follow practical guides for mapping, navigation, and real robot deployment.
Developers Guide — dive into the internal design and architecture of the EasyNav framework.